Quantcast
Channel: Santa Cruz Warhammer
Viewing all 136 articles
Browse latest View live

40K, Bolt Action: creating great (but simple) terrain from resin scraps!

$
0
0

Allright, not all posts on this blog are life changing, mindbending, innovative. This post is a small, humble little ditty, but it's also old school Santa Cruz Warhammer: make some simple terrain, paint it up quick and dirty and use it the same day!
So you know how all the forgeworld models come with the resin feeder pieces still on the sprues. Here's an example:


I recently got some Contemptor Dreadnoughts, so I was left with a bag of those feeder pieces. They reminded me of roadblocks, tanktraps, or just little walls. So i figured to use them instead of throwing them out. I knicked the resin with knife, created some bullet holes and glued them to a base with some sand:

I gave it a quick, simple paint job and BEFORE the washes, added some decals, some from the Space Marine vehicle sheet, some from the Guard decal sheet:

Then wash, drybrush, wash, drybrush, until you get tired of it and call it a day:


The pieces that stick out look like rebar, rusting and nasty. And that's it! Use it in your 40k games:
 
or your Bolt Action games:


Below I used some of the pieces in a larger diorama:

In closing, this is the stuff that makes our hobby so great! Simple, cheap options to make your battlefield look a little better and having a quick, satisfying hobby project!

Hope it inspires!

SC Mike

Sunday Teaser!

$
0
0
Check out Santa Cruz Warhammer tomorrow to find out more about this guy!

Nagash; the road to a table top-ready model!

$
0
0

Hi, Pezman here!
When I saw the Nagash model was being remastered, I knew I was going to have to pick one up.  Not so much to play battles of the End Times, but just because the model looked too good to pass up.


Before I talk about the painting process, I have to address how well this model goes together.  Nagash is a prime example of what can be done with modern CAD design. I would estimate that about an hour after sitting down, I had built all of the sub assemblies and was ready to start the business of painting the model. He is honestly a joy to assemble. You almost don't need the instructions because he goes together so smoothly and intuitively.  What is more, because Nagash is such a large model, over 9 inches to the top of his head, he has very few fiddly pieces to slow down the process.


Once I had Nagash into his sub-assemblies, it settled in with the rattle cans and the airbrush in my usual way.  I divided the pieces into those that would receive black, white, or grey primer and set the airbrush to go to work on the robe and ghosts which make up the lower half of the model.  In the picture above, you can see that the cloak and ghosts were largely complete at this phase with out having done much more than some simple airbrush work and paying attention to directional spray.  As for the body, I made liberal use of a  traditional 3 step tabletop painting approach.  A base coat, a layer of highlights, and a wash to unify the base coat and highlight while adding shadows.  Another benefit of Nagash being such a large model is he takes to washes incredibly well.  The recesses in his sculpt are deep enough to really provide a lot of texture for the washes to settle in on.


Once the bulk work was done, I settled in to picking out the details like his scabbard, books, sword, and the details of his armor.  I also experimented with adding glazes of color to help bring the look of the model together in a more cohesive way.  If a painter were so inclined, I think this is the point where he or she could spend years painting Nagash.  The model is not unnecessarily crusted with intricate details like so many other GW kits, but rather thoughtfully balanced between a few key details and large open areas, but more on that later.


In the above photo you can sees some of the glazes I put in on the armor and book to help unify the colors a little by bringing some of the blues from the ghosts on the base into other areas of the model. This was my first time working with GW Lahmian Medium to create glazes.  I have to say, again, I was pretty impressed.  It does exactly what GW advertises it to do.  It allows you to "thin" your paint without losing any of the control you would typically have.  As a result it's very easy to build up gradual transitional layers of color like you can see in the blue I applied to his book, eyes, and shoulder armor.

You can see in the picture above a combination of all of the techniques I've mentioned above coming together on the books in his ghostly trails. It's at moments like this that limiting how many colors you use can really pay off.  I primarily used 2 shades of Minitaire blue (Troll Hide and Lagoon Blue) on all of the ghost areas.  Most of the books were painted in a traditional 3 step manner, but the ghost trails were painted with an airbrush.  As a result, the two components clashed when joined together.  I went back in with the airbrush and the glazes mentioned above to help make it look like the books were either part of the ghost trails or, at least, caught in them.  Because I had only used 2 shades of blue, it was easy enough to color match and keep things looking unified.  


The last major step to take on was his base.  I added a few Secret Weapon Miniature ruined pillar bitz along with some slate and various sizes of grit and sand to create a bit of visual interest on the base. Once all of the components were in place, painted, and dry; I went back in with the airbrush and added a ghostly glow on the ground and to some of the raised elements.  This was an effect I'd seen another painter online add to the model, and I think adding that glow adds a lot to the feel of power conveyed by the model.


I predict we will see a few amazing Nagash models gracing painting competitions in the next year or two.  Nagash has all the essential elements required for a painter who wants to really spend some time and effort on a show piece.  He has some beautiful iconic details in the form of his crown and back spines as well as some lavish organic shapes and open areas which master painters will take to new hights.  What might be most impressive about Nagash is what isn't there.  Through the use of negative space, he really does look like he's floating over the table on magical winds of necrotic power.  As for my paint job, I wasn't thinking show piece, I just wanted to see a nicely painted version of this iconic character in my collection as soon as possible.  After all, if  GW could take Nagash from his early days as a Liche King Clown, then the least I could do was give him a proper paint job to match his newly empowered form.


 As always, thanks for reading, and please let me know if there are any questions about techniques or approaches to painting I've mentioned above.

Cheers!

Pezman


Sunday Teaser!

Modeling: hiding seam lines on organic sculpts

$
0
0

Let's talk about how to quickly hide model seam lines on organic models. It's quick and easy and you'll save yourself a ton of frustration scraping plastic and kneading little strips of green stuff.

When I first saw the new Tyrannocyte model I was struck with how disgusting/cool it looked, and then by what a nightmare hiding the multiple seam lines would be. The modelers at GW do an outstanding job of hiding the seam lines, and the recent advances in CAD assisted design have placed them in a way to reduce how obvious they will be; but those of us that have put a few models together over the years know that a few (fairly) straight seam lines will detract from the organic effect of this disgusting flesh-sac, especially once you start drybrushing and washing the model.
Hiding the lines is a lot easier with tanks and power armor, I usually just scrape the surface flush with a knife, or in extreme cases use a modeling putty like Milliput or green stuff to hide seams and miscast areas. But the scraping method is difficult for a model like this due to the raised edges on either side of the seam. Not to mention a perfectly flat surface on an undulating/veiny model looks conspicuous in its own way. Modeling putty can hide seams but you're going to have to invest a lot of time and effort blending it in, and then modeling details to match the surroundings so it's not another smooth patch on your model. 

Way too much time and effort wasted when you could be building & painting instead.

So to fix our problem we'll be using water effects. Different companies make different formulations, which vary in how they behave. The most useful ones I've found are Vallejo Water Effects & Woodland scenics Water Effects. The Vallejo product comes in a few pre-mixed colors or transparent, but since we're going to be paining over it the color in this technique the color really doesn't matter. The major difference between the two products is that the Vallejo is a little softer, while the Woodland is a little more sticky lending it to more fine details. Since we're trying to mimic the surface of the Tyrannocyte the Vallejo would be the better choice this time (I'll explain more about other applications at the end of the article).

Let's get started, assemble your flying sac...


As it's coming together we can already see where the problem areas are going to be...


Target identified...


Now that it's together, we can get our Water effects out and start application...


Get a old brush you're ok with messing up, and glob enough of the water effects on to completely cover the seams. Then, go back and push the gel around to create a few ridges and valleys to mimic the veins and lumps of the model.


Leave the model alone for a night then check on it, the gel should have dried to be transparent. If it's not, let it sit until it is.


Then prime your model normally and you'll have hidden the seams and added some great detail!

Excluding drying time it only took a few seconds of work, and your model is ready for a propaint job. 


Hobby funds are a little tight over here, so I'm going to have to send it to my in-house propainter. ; ) 


The water effects have wider applications than this one, and can be used to cover seams and other irregular surfaces on your models. But experiment a bit with different brands to see how they behave before glopping them on. For example the Woodland brand is thicker and a bit more tacky, so it would work better for creating the peaked texture of fur while the softer Vallejo's peaks would become rounded and not have the same definition. 

Experiment with the water effects, and let us know if you've found any new applications on your models.

 Thanks to James Wappel for reminding me about using the water effects to hide seams (I wouldn't have remembered if it wasn't for his recent blog post), check out his blog for top-notch painting and modeling.
Also thanks to Mythic Games in Santa Cruz for lending me the model to do this tutorial.

and as always, come by Santa Cruz Warhammer for more hobby fun.

-Mike M (cornumortem)

Sunday Teaser

Ahh, the ongoing projects....

$
0
0

I think I can speak for many of you when I say that I feel overstretched, distracted and without enough time to finish all the modeling projects that I am so excited about. I keep telling myself it's OK, "you still have a lifetime of modeling ahead of you", but when your buddies start putting some ultimatums on you, it makes you think. So today I am taking stock.

1. 1000 point mirror list
Every heard of this insane idea? Everyone in your modeling group agrees on building the exact (i mean exact) same Space Marine list. Can be any army, but no army specific weapons or rules. For some reason, all my friends put this together in a matter of weeks, but I have completely imploded on it.

I received this entire army from SC John in a ziplock bag, all battered old models with crazy amounts of paints on them. I figured it would be interesting to NOT strip but instead paint over all of them and see if they could look decent. While John handed over the bag, he threatened: "better get started on this...", then in a friendly, wishing voice: "I just want to play games with my friends..it would be so great if you could also be there..."
 Ah, I know I am such a turtle when it comes to painting. The armor is almost done and I am happy with it, but repainting old space marines takes me forever.

BUT it will have to get done and I might just start a series with all our 1000 point armies to give myself a kick in the butt. I need deadlines! 

2. Bolt Action British Eight Army
This past week I finally finished all the 15 models I put together 8 months ago along with a tank.It felt great and I really enjoyed putting the group together for a family picture. 
Of course the box set from Perry Miniatures has 38 models in it, so that leaves 23 models unbuilt, unpainted.....but finishing this group was a personal victory for me!

3. Spacewolves
With the new rule set my Wolfwing went out the door and I am faced with retooling the Wolves. First I modeled this guy, a psyker Inquisitor, Lord Coteaz!
Then the wolves:
and now a few Contemptor Dreadnoughts, one of which I put together as a relic dreadnought over the past few days. Here's an artsy shot of that guy:
Here is another Landraider that also fits in this army, but the one on the right is not ready yet, and I haven't touched him in 6 months or so....but it should be there when I am ready!

4. Bolt Action US Army Northern Italy
This is the army I feel most satisfied about right now. I love playing Bolt Action and the army is painted up, so each time I get a model for it, I can finish it and feel that the army is complete. Over the last three weeks I worked on this little jeep and I enjoyed creating a small family shot as well. I will do a post on the jeep this coming month.


5. What else is there? Well these guys:

So in sum, there are so many models still to build and paint. I generally don't get to play much so the deadlines of having units ready before a game don't really happen often. So it all boils down to a good feeling about a project; it can happy suddenly one morning. I FEEL like painting some goblins and BAM, I manage to paint one or two. And then they go back to sleep. 

Does anyone else recognize the behavior in this post? If so share some stories, and links.

SC Mike

Sunday teaser!


Using alternate barrels for a Kheres Assault Cannon

$
0
0


Recently I was able to own two Contemptor Dreadnoughts, unbuilt and fresh in the bag. One of them was a Relic Contemptor and I built him in a standard mode with the powerfist and a Meltacannon. He is being painted in white right now, as one of two Space Wolf contemptors.

But the other one, which will be painted blue, I wanted to build with the 'cheese cannons', the Mortis Contemptor with the double Kheres Assault Cannons.

image: Forgeworld


When I opened up the package, I wasn't too happy with the quality of the 6 barrels of the guns. Here's a shot of all the parts (not my parts - found it on google), and you can see that the barrels are not straight.

On my set it was similar - I tried working with it, but wasn't happy.

That's when I dug out some Evergreen Plastic rod of an appropriate diameter and cut off six equal lengths. Then I got to work, slowly but surely.

After twenty minutes of quiet and patient work, my alternative barrels were built and the gun looked great:, straight, tight and the barrels were just a tad fatter, which makes the cannon look more formidable.


Give it a try!

SC Mike

Space Wolf Contemptor Dreadnought; finished.

$
0
0

Over the last month I have slowly picked away at painting the first of two Contemptor Dreadnoughts that I will add to my budding Space Wolf army. Here's the finished model, equipped with a Twinlinked Melta Gun.

I had big plans for this little guy, when I started. Here's a building shot that accentuates his pose. I really wanted to make use of the flexibility of the design, being able to bend his legs. The Contemptor Dreadnoughts are so much more interesting to work with then the conventional dreads, because they can be positioned so well.


I really wanted him whole body turned, and paying attention to something on his left side.

After finishing the build I got inspired to create some decals for him, based on some old nordic Viking artwork. Here's the decalsheet that I created, and of course anyone can use it.


Testors decalsheets come only in 5.5 x 8.5 so that's what the file is sized to.
I followed the instructions, and the the shoulderpad decal went on pretty well, using a decal softener. But after weathering and washing, the inks started drooping anyway. In the end, I repainted some of the viking ship in the artwork. I still looks cool, but not as crisp as i wanted. The roman numeral 7 was added later.

On the decal sheet you can also see the rune decals, but unfortunately, they really should be printed on clear decal paper and I only had white. So I couldn't use them. I perused my many decalsheets and added a name to his other shoulder, sorry a bit blurry.
 
I spent quite a bit of time weathering this old dread and make him fit into a barren, cold and lifeless landscape.
I mix a lot of washes and overlap them as well, often painting 2 or 3 times over the same area in different shades of the same color. I feel that in this way, the armour really ages well. It's not a clean paintjob, but it is effective.


I added a bit of writing on his breast scrolls, some runes with archival brown ink.


All in all a fun project! I will build and paint one more, but this one will be in blue!

SC Mike

Painting With Washes!

$
0
0

I recently purchased a few of the James Wappel painting pyramid videos and was really surprised by James' unique approach to painting models.  Essentially, James applies a very fast basecoat of colors to the entire model using shades of color that are slightly lighter than where he wants the finished model to end up.  From that point on, he primarily paints with only washes and glazes.  Essentially, he goes over the model in a series of thin layers of dark colors adding shadows and color variety all over the model.

I decided to give this technique a try on my copy of Enigma Miniatures Driatram  I'll be using this model as a Wight King in my Vampire Counts Army.  In the two pictures below you can see the pallet of washes (mostly Secret Weapon here, but the GW ones work quite nicely as well) I decided to use and the basecoat I put on the model. I kept the colors on the basecoat very light, possibly too light.  Notice the huge difference between the color values on the basecoat (very light) and the washes (mostly darker).


You can see in the photo below just how quickly the washes darken the model and begin to create distinction among the various shapes.  One of the principles of painting in this way is that you cannot just slop on a wash all over the place.  These are single thin layers of color.  In most cases, a single brush stroke of the wash was more than enough.  I kept a paper towel handy throughout the process to dab away extra moisture and washes.  That said, you are working with very thin washes on the entire model at once, so inevitably, the colors will run and bleed together a little.  However, if you're not over applying the wash, this should be manageable. and in most cases create a desirable effect. Once the model was washed all over, I dried the paint with the hair dryer after each step.


Below, you can see my 3rd and 4th passes over the model with the same washes.  I tried to focus my blue colors into the armor and the yellow greens into the robes and clothes.  I also realized I would need to add some more warmth to his skin to keep the model from looking washed out so I applied some of the red (Secret Weapon Drying Blood) to his face and hands.  Also, I realized that I had gone a little too far in some areas with the wash and things really looked quite muddy... I applied too much wash.  So, I went back with some traditional, opaque paints and highlighted the bottom of the robe, the armor, and the bandages on his arms.  These highlights were all applied quite quickly with little more than a drybrush.  As you can see at this point, I was simply making minor adjustments as there is very little change in appearance of the model between the steps.

With the final steps, we return to traditional opaque paints and pick out a few highlights and details.  I added  a flame effect (still working on getting that OSL right) to the sword, and added some edge highlights to his face, armor, and small details.  Overall, this technique is really quite easy to use and allows for a lot of very subtle blending and color variation without spending hours and hours working with super thin traditional paints.  Total time spent painting between the first wash and the picture you see below was about an hour and a half (30 minutes of which was spent on the OSL).  Now, in the spirit of full disclosure, this technique does have a steep learning curve, as it will feel odd to most people to allow their paints to ooze and mingle all over the model, but with a little bravery the effects can be quite nice indeed.
  As always, thanks for reading, and if you have other techniques you'd like to see me cover please don't hesitate to request.

Cheers!

Pez5767

Santa Cruz Fury Road!

$
0
0

The Santa Cruz Warhammer group in Santa Cruz, California has been gripped by a really fun, new project: playing games with little cars and modeling them in the style of Mad Max. The cars, mostly Hot Wheels and Matchbox, are cheap, mostly around 99 cents each and the modeling can be pretty daunting, at least if you want to make something good. You can also find actual cars used in the movies, like the Ford Falcon or the Chrysler Valiant, but those are out of print and only to be found on Ebay, for 5-10 bucks each.

There are few different road games you can play with these cars, like Car Wars or Road Wolf (which is what we play in Santa Cruz and is free online ), and there are plenty more, (if you know of some good ones, share them in the comments). The game does need a gaming surface, mostly roads and some buildings. The scale is smaller then 40K so you can't use any of those terrain pieces. The game rules are pretty much free and online and there is NO company support for it; it's a true grassroots movement!

Being a modeler first and a Gamer second, I loved the idea of buying models for a dollar and spending a joyful week on them, cutting them up and kitbashing them (and not having to spend 40-50 dollars). Before I saw Fury Road I bought two random good looking Hot Wheels and kitbashed them; here's one of them:
and the finished model:

You can see that with a bit of inventiveness and good size bitz box, you can really have a lot of fun!

Here are some more builds from our group:
(Chris Wolfe)

(Jordan Nichols, not painted yet)

(Cornumortem)


Then I saw Dave Taylor, whom we all admire, work on his Mad Max models; they are amazing! Dave really shows what's possible with good modeling skills and great vision. Here are three of Dave's cars for his Fury Road project, he uses them with his group in Car Wars and on his blog he shows wonderful how-to's.


Dave is also part of our Facebook page Santa Cruz Fury Road and it's been really fun sharing ideas and showing of builds with him.

I tried my hand on copying Dave's Hedgehog conversion you see above and I am still working on it, but you can see how much fun it is to mess around with all this.

AND now I want to see someone tackle this one (Dave Taylor...)


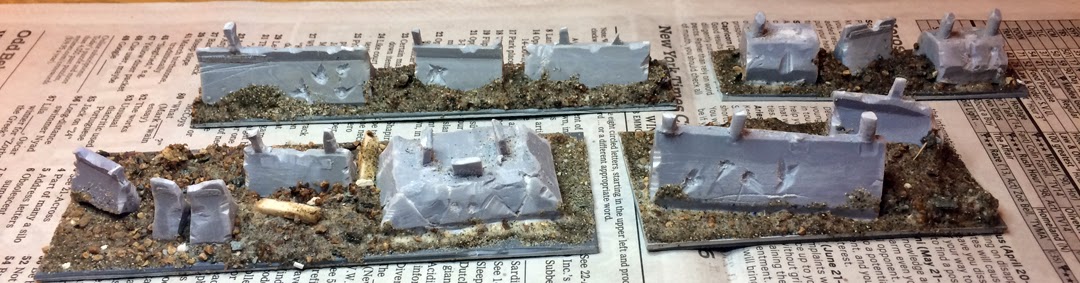
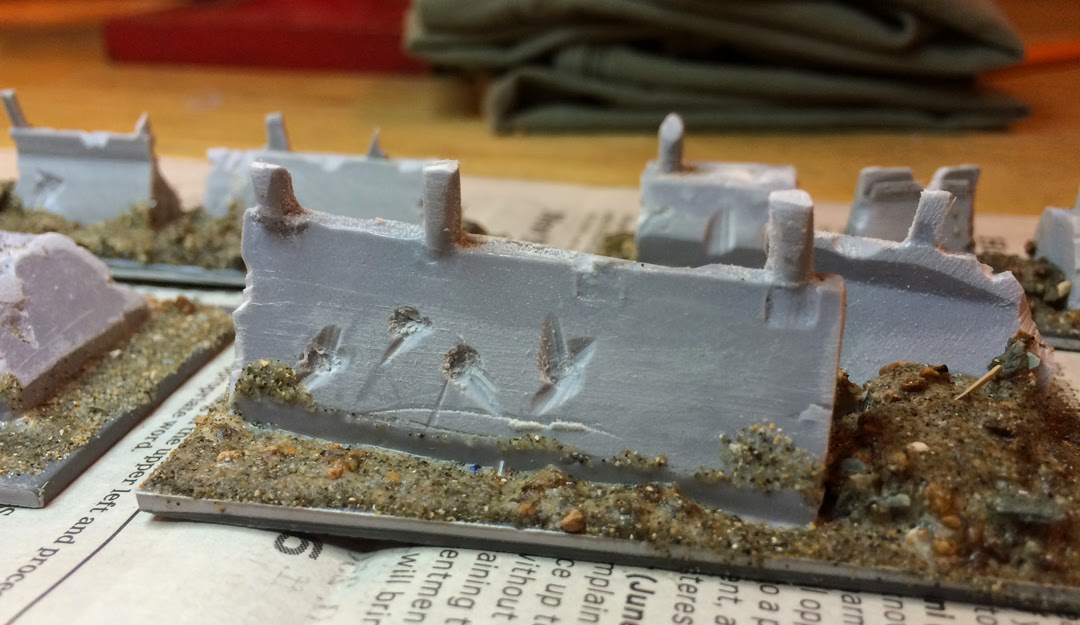
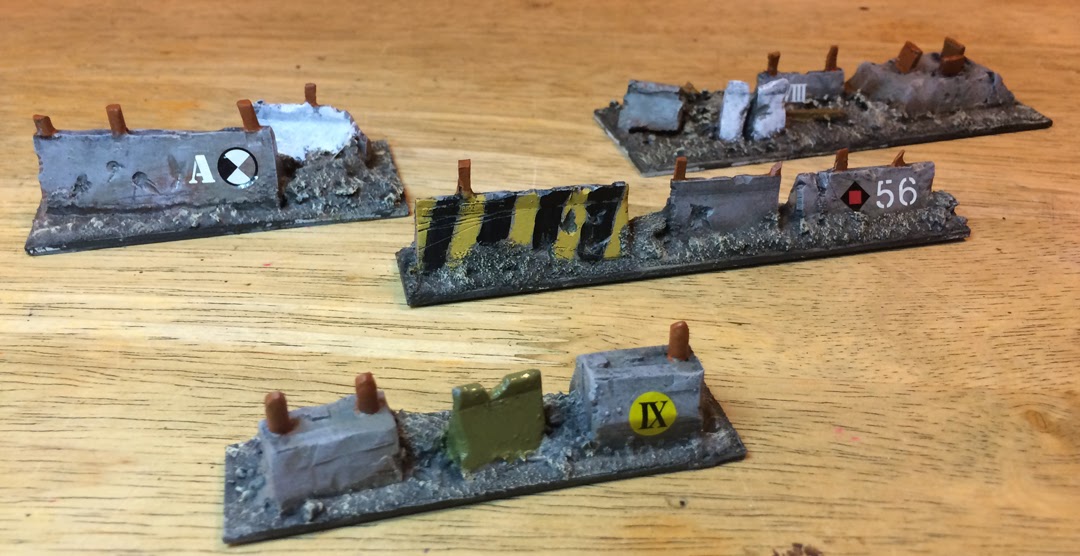
Here's our game board built by Sc John, founder and driving force in the Santa Cruz Fury Road Project:
and after finishing it up:

So far we have played one group game with our cars and we are still getting used to the rules. The dice rolling for Road Wolf is different, but makes for a lot of fun. After playing for a bit, you quickly learn how fragile bikes can be and how important the roads movement phase can be. In our game the road and it's hazards claimed almost as many cars as the fighting did, but to be fair we were driving a little on the reckless side. 

Lots of local friends have started looking around everywhere for models.... SC John  found this little gem at the flea market for 50 cents: '73 Falcon, the original Mad Max Interceptor and it will get the treatment soon.

Cars can be found for pocket change at yard sales, second hand stores and flea markets, or new for about a buck at discount stores.

Scale can be a bit tricky for semi trucks and motor bikes to keep them in the scale range of the 1/64 scale Hotwheels and Matchbox cars, and dirt bikes are proving to be the hardest thing to find so far.

SC John started the group TWO weeks ago and so much has been done already! It's really been a long time since I felt this surge of inspiration going through our gaming community and you can do that as well! Start a group and start looking for little cars....

SC Mike

Prep for Age of Sigmar Summer Campaign

$
0
0
O.k. I know it's been a year since one of us posted something, but here you go.

I've been eagerly anticipating the new Age of Sigmar Summer Campaign (kicks off July 14th) and I have been frantically modeling and painting up my Stormcast Eternals force. I just finished up painting my first 1000pts. (going by the soon to be released Generals Handbook)


But I've got a few simple tricks to easily convert some models so you don't have to shell out tons of hard-earned dough.

The first and most obvious tip is to buy the AoS starter box if you're interested in playing either Stormcast or Chaos. You can find them online for around $80 at the moment and if you have a friend who's interested in going in on it with you, perfect! $40 will get you a 900 point Stormcast army...shell out a bit more for a 100 point hero and there's a nice even 1000 point "Vanguard" force. I added a Knight Azyros for my 1000 point list.

I played in a small local tournament (and incredibly ended up winng it!) that offered lots of AoS prize support. As a prize I got a box of Paladins. This kit is amazing as it contains enough extra bits to kit out of convert tons of other models. Retail is normally around $58, but honestly, for the extra bits you get and the amount of money you'll save by converting, makes this kit totally worth it.
I chose to build most of mine as Protectors ( with glaives). This freed up tons of hammers (Retributors) and axes (Decimators). I spent some time snooping around eBay and scored a few more Retributors from the starter box. I snipped off the hammer heads to make quick and easy Decimators by gluing on the spare axe head.

Original starter box Retributors on the left, Decimator conversions on the right...simple!

Next, I scored several Celestant on Dracoth (Vandus Hammerhand) models from the starter set. If you're cheap like me and don't mind several of the same model in a unit, then this will save you loads. I also bought a 4 pack of Prosecutor shields, also from eBay.

I decided convert two celestant models to Extremis Concussors and two to Extremis Desolators using spare heads, hammers and axe head bits from the Paladin box plus the shields.


This conversion requires a bit more clipping and filling in gaps with greenstuff, but the conversions are simple and quite easy.


Cutting off the head and axe are easy, but you'll have to fill in the gap on the shoulder pad.


Next up was to convert a starter box prosecutor prime into a Knight Azyros. Originally, I used a spare 40k Grey Knights sword in place of the hammer in the right hand and a lantern bit from an old Empire or Mordheim sprue for the left. It looked ok, but I ended up getting the 4 pack Warhammer Quest expansion and building the Knight Venator which has the sword and lantern to make an Azyros. I swapped out the grey knight sword and empire lantern for the proper bitz and this is what I ended up with.

Again, not bad, and it saves a bit of money.
I have a few more conversion ideas, such as converting a Retributor to a Knight Vexilor using the spare banners that I cut off from the Celestant on Dracoth models as well as converting a Lord Relictor into a Lord Celestant on foot.

I hope that I've helped to inspire you!!!
Ciao for now, 
SC Glenn

Article 1

$
0
0
Greetings!
I hope you've been getting in tons of gaming, modelling and painting!

With all the excitement over the new Warhammer 40K, I thought I'd share a little of what I've been up to...
Besides painting Primaris Reivers and playing in the Konor Campaign at our local FLGS, I've also been busy updating my website that I created for my Space Marine Chapter - The Archangels.
I've had a website dedicated to them in all of their incarnations since about 2001. You can check it out here if you're interested!
The story for my space marine chapter has been completely overhauled for the new 8th edition of the game and introduces Primaris Marines into my chapter. I've also been going back to Bolter and Chainsword and updating all of my chapter info on my old entries there as well.

This new version of 40K makes the game very enjoyable and much quicker to play. It has reinvigorated many who have been burnt out on playing to come back and check it out.
SC John and SC Mike have even been working on new projects as well. Here's something SC Mike is working on at the moment - Amazing Mike! Keep up the great work!!!
I know this page doesn't get updated much, but we've all been quite active on SC Warhammer and The Barter Bucket over on Facebook. Please check out our pages there!

If you love writing online fluff for your wargaming hobbies, please feel free to share the links!

~SC Glenn


WiPs

$
0
0
Hi,
It seems we've all been quite busy lately. SC Mike has been painting and converting up an incredible Nurgle warband. He's already challenged me to a match soon too! I can't wait!
Here's some of his stuff:
The latest corrupted brother
The warband grows!
Poxwalker
 More Poxwalkers

I've been working on my Primaris forces, albeit slowly.
I've got a squad of Hellblasters and a squad of Intercessors assembled, primed and ready to paint. Here's a pic:

Primaris Intercessors ready for paint
Our friend Pezman is preparing to run a Blood bowl 7's league in a couple of weeks so I've also been getting my team assembled and modifying my pitch - more on that later.

SC John has also been corrupted by Nurgle and is working on his new Nurgle army as well.
If he ever sends me pix, I'll post them here!


New Project in the Works!

$
0
0
Here's a little tease for our upcoming project...


Upcoming Blood Bowl 7's League

$
0
0
A bunch of us Santa Cruz folk are getting our teams ready for a new season of Blood Bowl 7's League. This is our 4th (I think) year of 7's run and organized by the world famous Pez!
We have a dedicated SCBB7's Facebook page where we talk smack and show off our painted goodies.

Here's what I've done so far...my Catcher and Thrower for my team the Griefswald Demi-Gryphs!


Here are some other images from league-mates...

Jason's Ork WIP

Joseph's Troll WIP

Evil Space Elves' Ork Team WIP

 Josh's Norse Team WIP

and Chris' stunning human team - The Reiksport Pirates

There are other players too but I don't have pictures for them yet. This should be another exciting league and I can't wait for it to start! I'll post league updates occasionally...


Sprucing up your gaming!

$
0
0
Hi,
Recently we started a new season of Blood Bowl 7's. Pezman has been running the league for us for 4 straight years now. Not only does he run the league, but he provides a weekly run down of stats (best thrower, most td's, most kills) and league standings.

I do my part to enrich the league experience by writing a bi-weekly newsletter for my team. But mine goes a bit deeper. My newsletter is produced like a school newsletter since my 7's team is supposed to be from the University of Greifswald - the Demi-Gryphs! Greifswald is my own made up Empire town in the mountains south of Nuln. (Yes, I know Greifswald is a real town in Germany!😊)

I include images, a student news sections, a classified ads section and more. Here is the latest issue:

Little touches like these go a long way to improving the overall gaming experience for everyone

Many of my league-mates can't wait for the next issue or even do back-stories, team bio's and newsletters of their own. It makes for a richer atmosphere and leads to intense, friendly rivalries!

I did a similar type of thing when I ran a large map-based Warhammer Fantasy campaign during the End Times. I had a weekly newsletter and each issue featured one of the campaign generals and their exploits! Here's a pic of the first page from Week 11 of the campaign - 
I hope I've inspired you! Keep up the good work!

Nurgle's Rot Tutorial

$
0
0
Hi,
Things have been a little slow hobby-wise for me recently. I've been playing in our local Blood Bowl 7's league but haven't done any painting or modeling in nearly 2 weeks!

SC Mike however, keeps pumping out amazing things! Take a look at his Nurgle Land Raider...

If you're wondering how to achieve this cool "rotting" effect, check out SC John's tutorial here: Nurgle's Rot Tutorial

Holiday Busy-ness!

$
0
0
Happy Holidays to everyone!
Each of us at Santa Cruz Warhammer wish you a wonderful holiday season!

We’ve all been rather busy lately with life and hobbying. Here’s some of what SC Mike has been busy with - A Winter WWII-Themed Cadian Army! Wow! Amazing stuff Mike. Keep up the amazing work!!!


“I finished the fourth and final uniform painting scheme for my new guard army, based on the German army during the failed Russian campaign. This one has the reversible camo uni, showing the standard army camo pattern all the way. I also modified the helmet color, less green, more blue mixed in. Group shot are the Four I am going use.” ~ SC Mike


Viewing all 136 articles
Browse latest View live